
If you’re a frequent viewer of this site, then the subject of today’s Trains & Modern Photography post is something you’re probably familiar with – panoramas. The most generic definition of a panorama is an wide view of an area, in which you can see in all directions. For my Metro-North Panorama Project, I used the definition loosely, featuring at least one photo per station that used the technique of stitching, thus giving the viewer a photo that provided a far wider view than one could capture in a single photo’s frame. Using modern technology like Photoshop, one can take multiple photos around a central axis point – either on a tripod, or by standing in the same spot and rotating your body, while holding the camera at the same angle for each shot – and combine them. This technique is called stitching, and is one of the most common methods of getting high quality and high resolution panoramas.
If this is a technique you’ve always been interested in trying out, or you’re just curious to see how exactly one makes a panorama (especially one featuring a train) – from camera to computer – read on.
Making a panorama
Taking the shots
The first part of any panorama is getting the shots that you need to blend later on. As a beginner looking to do a railroad panorama, I would suggest you try to capture a train that is not moving. Whether it is tied up for the night or just stopped at a station, having everything stationary is best – moving objects can cause issues and anomalies in the stitching process.
These days, programs are usually good enough to accommodate photos not taken on a tripod. But you’ll want to remain in the same spot, and most importantly, keep the camera at the same angle within each shot. Rotate your body to get a wide field of view across multiple shots. Make sure to overlap – 40% overlap is usually the rule of thumb – so the stitching program will have room to blend the images together. It doesn’t matter if you shoot horizontally or vertically, but if you want to get the highest resolution image, shoot vertically (it will likely require more shots to capture the full field of view, however).
 Â
  Â
  Â
  Â
  Â
  Â
 
Here’s an example of seven shots I took of an M7 making a station stop at Harlem-125th Street. Note how I’ve rotated along the field of view, while allowing some overlap between the photos. Since the train was not moving, I was able to capture it across multiple shots.
Things that move
If you’ve tried the stationary panoramas out, or your feeling a bit bold, you can go for a moving object. If you’d like to capture a moving train, for example, what you need to do is capture the ENTIRE train in one photograph (unless you want the train extending off the side of the image). For this reason, it is better to capture your photos in a horizontal format, so you can better capture the entire train. If you capture the train using multiple shots, because it was moving it will appear in different places each time, and thus impossible to stitch properly.
If you’re shooting a passenger train, after the train has passed, then capture the rest of the shots of your field of view. If you’re capturing a long freight (where in this case you probably would have the train extending off the edge of the image) it is probably best to get your other shots before the train arrives, since it may take so long for the train to fully pass that the sunlight has changed, making it very hard to stitch those images together.
 Â
  Â
  Â
  Â
  Â
Â
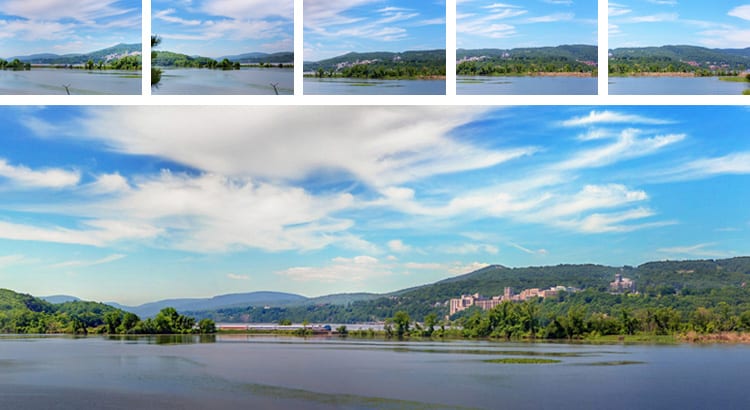
Here’s an example of five shots I took of a P32AC-DM on the Hudson Line, passing West Point. Note how in the first shot I capture the moving train, and then in the subsequent shots capture the field of view after the train has passed.
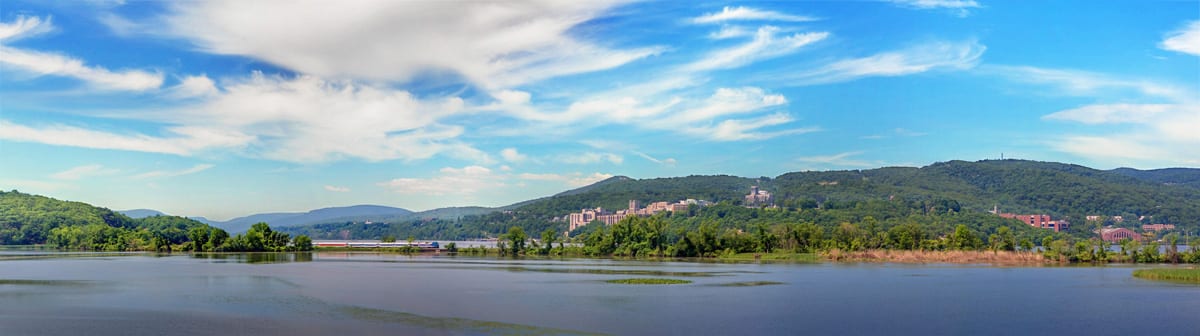
This is what those photos look like stitched together in a final panorama.
What program to use?
In order to make a panorama from multiple shots, you’ll need some program to stitch the images together. There are various free options out there, like AutoStitch, which I used regularly years ago (and was what I used for all of the original panoramas for the entire Harlem Line in the Metro-North Panorama Project), but these days I use Photoshop’s Photomerge tool. If you’re serious about photography, Photoshop and Lightroom really are the best programs for you to be using to make your images better. They’re the industry standards.
Using Photoshop’s Photomerge tool
Photomerge is relatively basic, from the File menu, go to Automate and choose Photomerge. In the window that pops up, select the images you’d like to stitch together using browse. For almost all instances you don’t need to change any of the default preferences. Auto layout usually does the trick, and you want to keep Blend Images Together on, as it blends any color discrepancies between the images, to make it look like one complete image in the end. Depending on your lens and camera, your photos may have some Vignetting, or a darker ring around the edge of your photo. If that is the case, you can check off Vignette Removal (I prefer to remove any vignetting in Lightroom prior, and if you use both programs that is what I’d suggest).
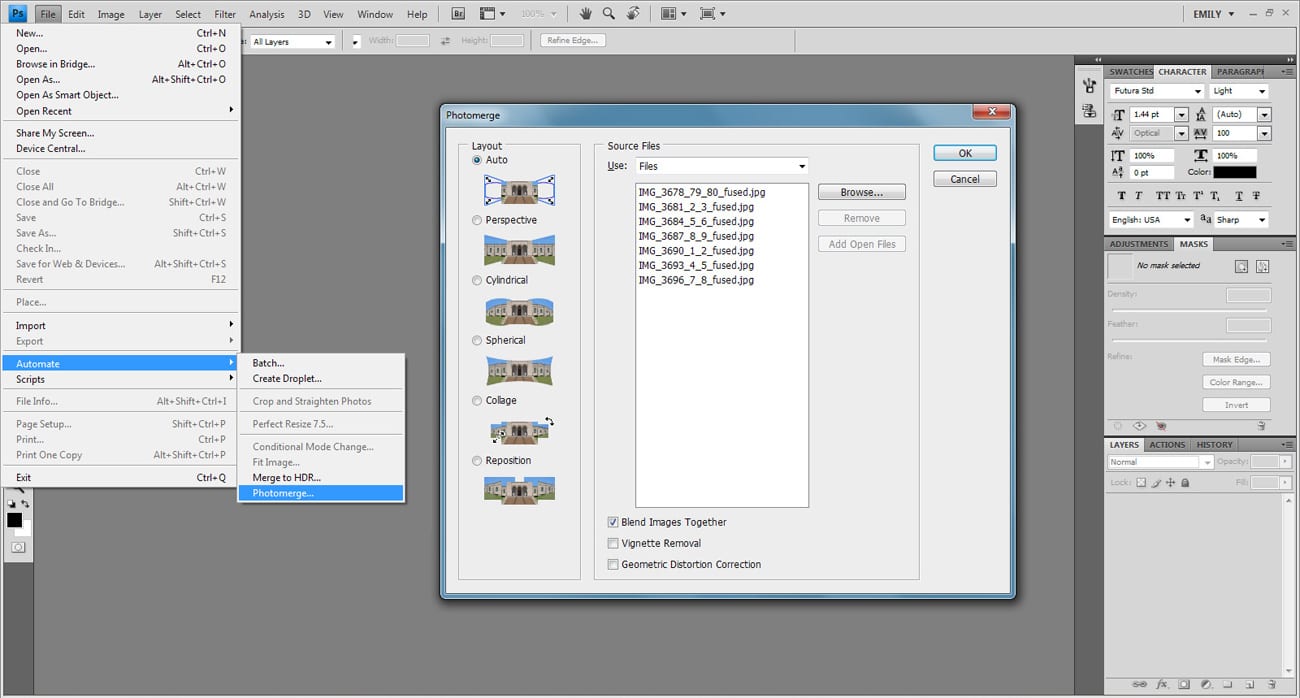
The menu showing where Photomerge is, and the Photomerge window.
Now you have a stitched image…
Your photos may now be blended together, but it isn’t quite yet perfect or how you imagined it. You’ll need to crop unwanted jagged edges, and make minor adjustments with the warp tool in order to get that perfect panorama.
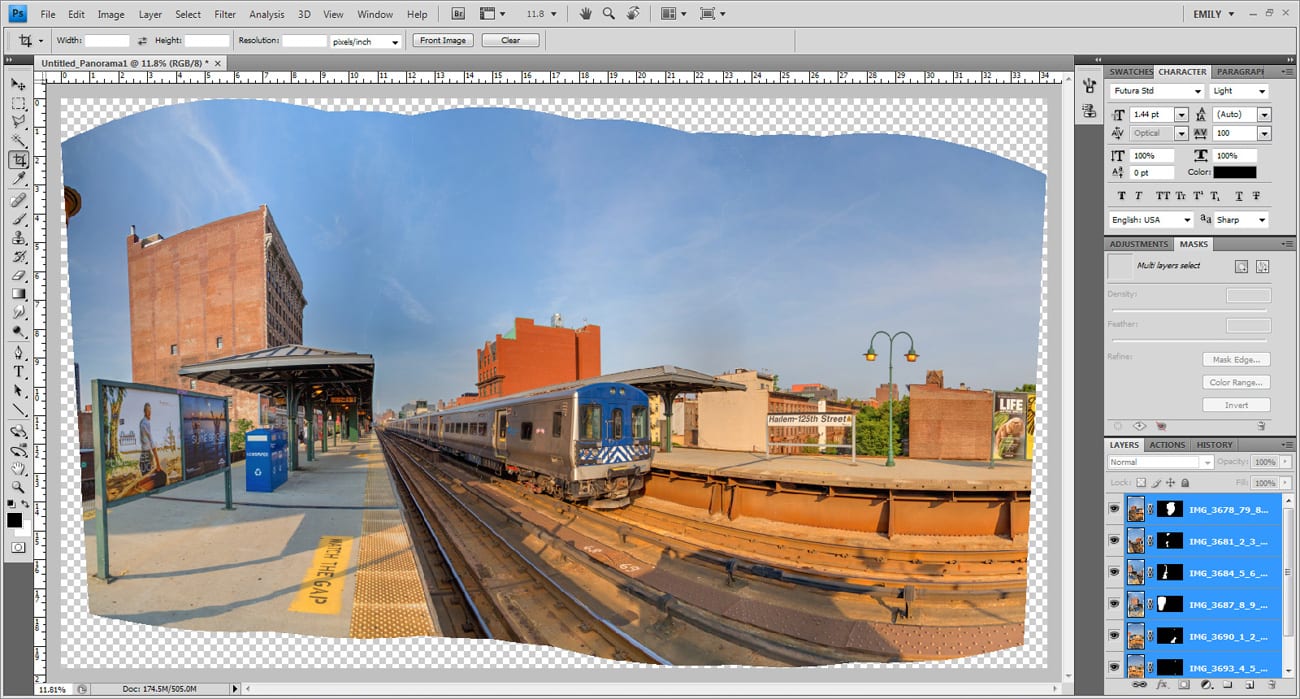
The stitched image that Photoshop spits out from the seven Harlem-125th photos. Note that each individual photo is a layer, which allows you to fix errors in stitching if there are any. Provided that everything looks good, you should merge all your layers before proceeding.
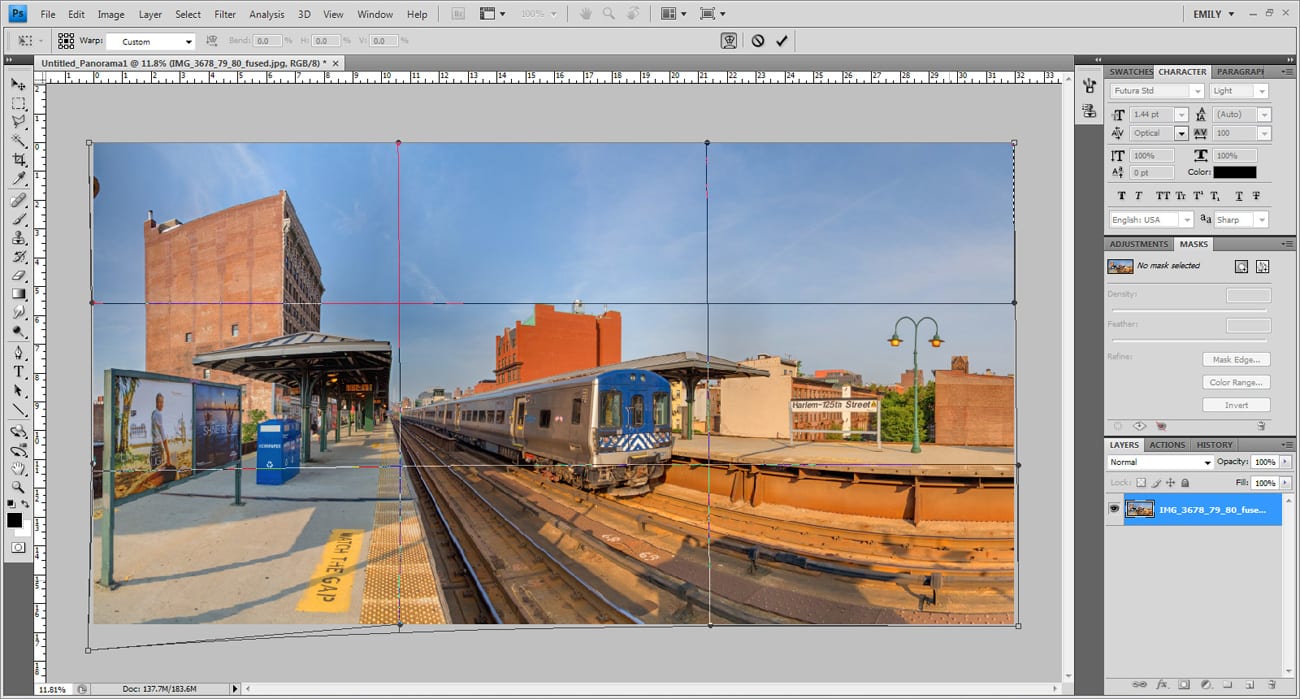
Working on the image – cropping and minor edits with the warp tool make the final image.
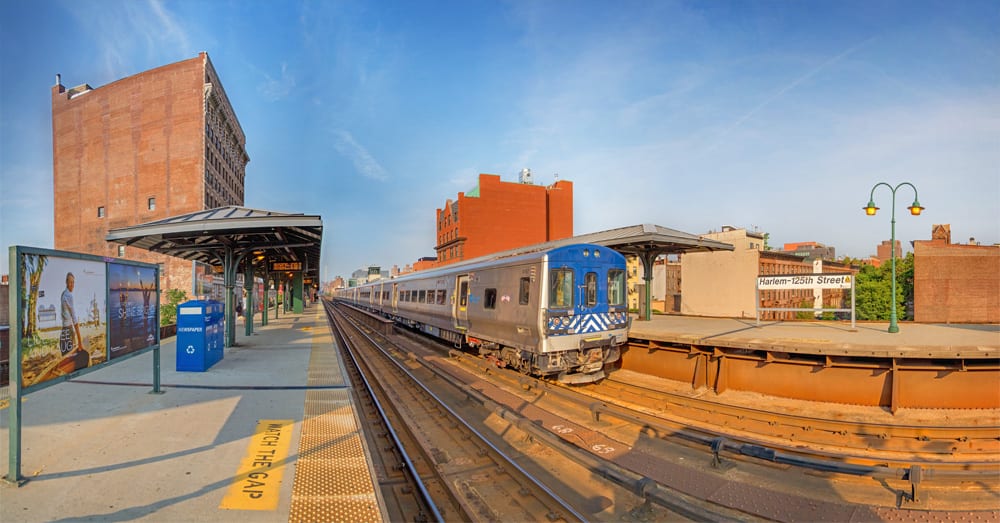
The completed panorama.
Questions about the process
Why make a panorama out of multiple pictures using stitching, when many new cameras and phones have a dedicated panorama feature?
The panorama feature you’ll find in newer cameras or phones requires you to pan the camera across the field of view, and it will automatically assemble the panorama for you. While this is, of course, easier, it doesn’t necessarily yield the highest quality result. If you’ve ever wanted to print out your photos, you’ll find that the resolution of an in-camera panorama job is low. In contrast, the West Point panorama above has a final pixel size of 14329×4000 – sufficient resolution to print the final image at a width of nearly six FEET. Now I’m not saying you’ll ever have to do such a thing, but you’ll get a higher quality, more detailed image that is croppable if you desire by stitching.
What are some fun things you can do with panoramas?
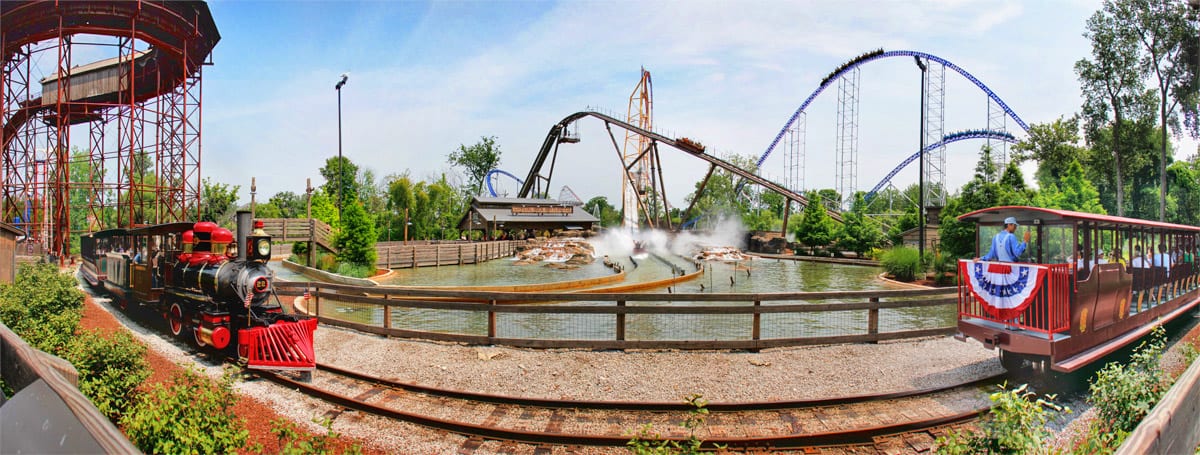
Once you get the whole “moving train” thing down, you can try this funky technique, which I’ve always liked. Capture the train entering your field of view on the left side, and then capture it yet again as it leaves your field of view on the right side. It looks something like this:
What other methods can you use to capture wide fields of view?
Besides panoramas and stitching, you can capture wide fields of view with very wide angle lenses, and fish-eye lenses. A wide angle does capture a wider field than a normal lens, but it can never capture as much of the field of view as a stitched image could. Fish-eyes are nice (and I enjoy them very much!) but the distortion they cause is a little too much for most people.
But sometimes there is distortion in panoramic images. How do you minimize that?
From an artistic perspective, I tend to enjoy the distortion you can get in a fish-eye or panoramic shot. It is almost like a visual cue that what you’re seeing is something beyond the capability of your own two eyes. In terms of railroad photography, it also introduces a break in the abundance of long, straight lines from railroad tracks and platforms. However, it isn’t for everyone. In a stitched image, you’ll get more distortion the closer you are to the subject you’re photographing. If you’re capturing a train that is on a platform (like the Harlem-125th panorama above), it is very difficult to achieve no distortion. In the Hudson Line panorama, however, there is no noticeable distortion, as I was far away from my subject.
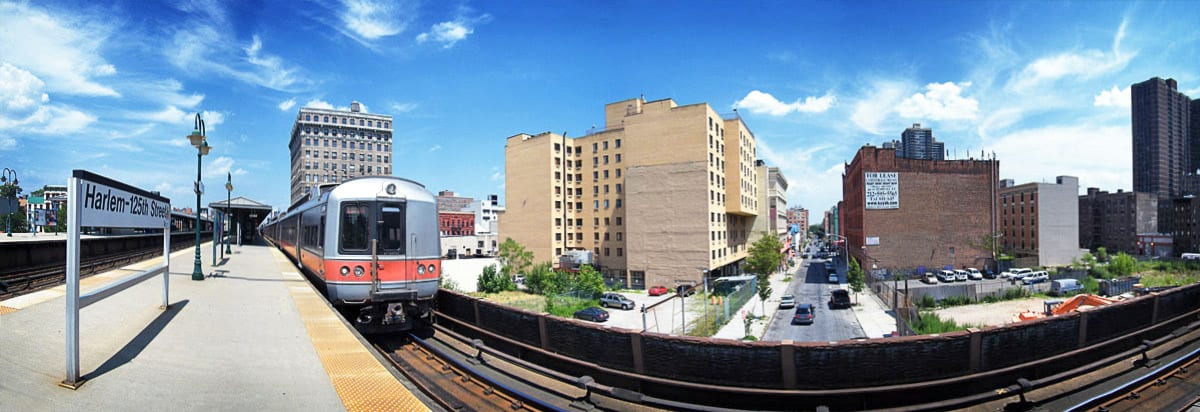
What is your favorite panorama from the Panorama Project?
Although I definitely consider the photos I initially took of the Harlem Line to be subpar considered to my work today, I’ve always liked this photo of Harlem-125th Street for some reason. I have a printed version hanging on my cubicle wall at work.
That just about wraps up today’s post – have more questions about panoramas? Have a panorama you’d like to share? Want to make a suggestion for a future Trains & Modern Photography post? Drop a line in the comments!
Nice piece! I’ve been looking forward to seeing what aspect of modern photography you would tackle next.
One note on taking photos for panoramas — it’s tempting to use an ultra-wide lens to capture lots of sky and foreground in your panoramas, but these lenses have a lot of distortion towards the edges of the image that make stitching nigh-impossible. I’d stay away from anything wider than 24mm-equivalent, and capture additional rows of sky and foreground if you’d like those elements in your final image.